
Ingredients
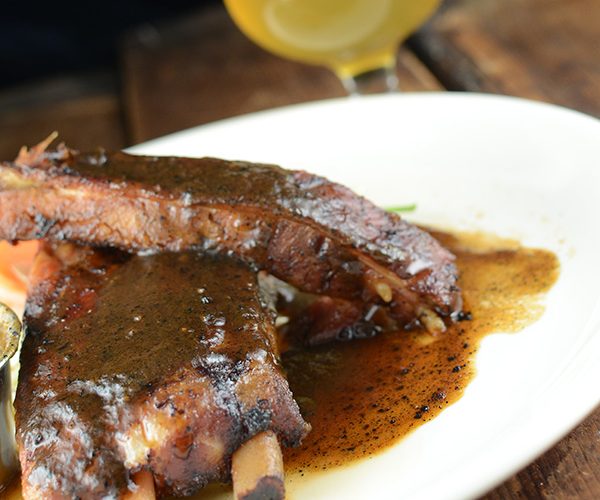
- 6 racks baby back ribs
- 1/2 cup liquid malt extract
- Liquid malt extract
- 1/2 pound dry malt extract. It's perfect to use in the dry rub, but since it's a very fine powder, it clumps up really easily. You'll need to quickly cut it 50/50 with brown sugar when you're ready to use it.
- 1/2 pound brown sugar
- 1/2 ounce Cascade hops
- Spices: Mix (in roughly decreasing order): salt, pepper, paprika, garlic powder, ancho chili powder and cinnamon. About a handful of salt, and just a big pinch of cinnamon.
Directions
- The basic idea for these baby-back ribs came from a growing interest in homebrewing. So much of what you're doing when you homebrew is try to understand how the different flavors from a beer's ingredients will come together into the final taste. To me, it's a natural extension to think about how those ingredients could work with other foods.
- With that in mind, I've also been looking for ways to bring out the taste of beer in food, without just adding beer as an ingredient. By the time beer has been added into a sauce or glaze, and then cooked down, there's so little left of the original flavors that you can very rarely taste them distinctly.
- Once you start getting familiar with the flavors of malts and hops, you can start to see how they could play a direct role in the flavors of a recipe. I know it sounds a little goofy, but the way I joked about it with my buddy Phil was that I wasn't trying to create something that tasted "like" beer, but something that tasted "of" beer—ribs that clearly evoke the key flavors that make beer delicious, without just tasting like they've been drenched in beer.
- Credit where credit is due: While the basic idea for this recipe was something that I had been wanting to make, the technique—and the equipment—are all thanks to my brewing buddy, Phil. He's not only made a science of figuring out how to cook ribs beautifully, but he's got a great grill that he bought specifically so that he could do stuff like this. This was very much a shared effort—I never could have managed to make ribs as good as these on my own. Also, we have to thank our friends at our local homebrew supply store, Adventures in Homebrewing (especially Matt), who set us up with the ingredients.
- Here's the "Too long; didn't read" (tl;dr) version of how to make the ribs:
- Make a dry rub, using a healthy amount of powdered dry malt extract and put it on the ribs.
- Prepare a glaze, using liquid malt extract for part of the syrup, and add the flavor of some steeped hops.
- Cook the ribs for a few hours, low and slow, basting regularly with apple juice.
- Wrap the ribs in foil, and put them back on low, slow heat for another couple of hours.
- Unwrap the ribs, and cook for a final hour, applying the glaze several times.
- EAT!
- Mix the rub: Break up the brown sugar so it's really granular, and then gradually mix in the DME. Once you have them combined, add the spices.
- Apply the rub: Shake the rub generously along each side of each rack, first on the silverskin (concave) side, and then the outer side with the meat. Shake it on especially thick on the meaty side (like almost 1/4 inch), and pat it down so that it sticks. Since the DME cakes so easily, you want to keep the "fresh" rub in its own bowl, and apply it to each rack separately. (Any rub that touches the ribs is going to gum up quickly.)
- Rest the rub: Let the ribs sit for an hour or two, after you've applied the rub. They'll give up a fair amount of moisture, which will turn the rub into more of a glaze, but you'll also want to make sure that you've got the ribs in a pan or some other container where it's OK if they give up some juices.
- Steep the hops: Bring a small saucepan of water to a boil, and put about a tablespoon of hop pellets into a tea ball. As soon as the water boils, take it off the heat, and drop in the hops. I steeped them for about five minutes, and then ran the liquid through a coffee filter to strain out the stuff that got through the mesh. Drop in a couple of ice cubes to cool it down, and stop the steeping process. You should end up with a clear, greenish broth that has a pronounced, sharp smell.
- Start the glaze: Use some combination of the LME and left-over dry rub, plus anything else you want to create a glaze, like honey, molasses, Worcestershire, etc. Once it's starting to simmer, I like to add a good shot of whiskey, and then burn it off.
- Add the "bittering" hops: Once the glaze has started cooking, add about 1/4 cup of the liquid from the steeped hops. This is going to give the glaze a sharp bite when you taste it, but remember that it's going to be cooking down for at least a couple of hours before you use it, which will mellow it out, and it's going to be applied pretty thinly over the ribs, so you need it to be strong enough to still come through a bit when you eat them. Make sure to reserve some of the steeped liquid for later.
- Cook down the glaze: If you can easily keep it at a low heat, you can cook down the glaze for the entire time that you're cooking the ribs. You may need to thin it out every once in a while, but just like the meat—the longer and slower, the better.
- Add the "flavoring" hops: When you're getting the glaze ready to apply, add in a bit more the steeped hop liquid. This should add in some of the more aromatic smells and flavors that got lost from the first batch.
- I'm not going to go into a great amount of detail on how we cooked (OK, how Phil cooked) the ribs, since everyone's got a different grill, a different technique. All of the key parts of this recipe still apply, no matter how you cook them. For the record, though, this is basically what we did:
- Heated the grill to 225°F for about an hour before we put the meat in.
- Moved the coals to the sides and arrange the rib racks pretty tightly together in the middle.
- Every 30 mins, we rotated the ribs' position (like the tires on a car), so that the ones that had been in the middle moved out to the edges, and vice versa. We also flipped them over each time, and brushed on some apple juice.
- After about three hours, we wrapped the racks in foil, and put them back on the grill for a couple of hours. (We had six racks, that we wrapped up in two packets of three racks each.)
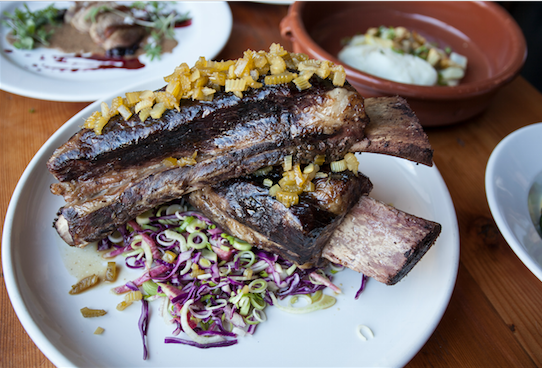
- We unwrapped the ribs, put them back on the grill, and then glazed them for a final hour.
- We had four adults and six kids, and tore through six racks in about 20 minutes. We're already planning on making them again, soon, and continuing to refine the recipe. Let me know if you have any questions, or if you try to make them, definitely let me know how they turn out.
Share Post